SSM框架,使用CXF编写webservice

最近在编写项目的时候需要使用到webservice,故记录一下学习过程。
本文章采用CXF,来编写webservice客户端,框架为SSM。
第一步:引用jar
   <!--cxf-->
        <!-- https://mvnrepository.com/artifact/org.apache.cxf/cxf-rt-frontend-jaxws -->
        <dependency>
            <groupId>org.apache.cxf</groupId>
            <artifactId>cxf-rt-frontend-jaxws</artifactId>
            <version>3.1.6</version>
        </dependency>
        <!-- https://mvnrepository.com/artifact/org.apache.cxf/cxf-core -->
        <dependency>
            <groupId>org.apache.cxf</groupId>
            <artifactId>cxf-core</artifactId>
            <version>3.1.6</version>
        </dependency>
        <!-- https://mvnrepository.com/artifact/org.apache.cxf/cxf-rt-transports-http -->
        <dependency>
            <groupId>org.apache.cxf</groupId>
            <artifactId>cxf-rt-transports-http</artifactId>
            <version>3.1.6</version>
        </dependency>
第二步:编写接口以及实现方法
接口:
//注意必须加@WebService注解
@WebService
public interface ProductCheckWebService {

    //webservice所调用的方法,注意必须在接口中增加@WebParam,才能实现自定义参数名,否则xml的参数名必须是arg0、
    //arg1...
    String hello(@WebParam(name="barcode") String barcode);


}
接口实现:
@Component("hello")
@WebService
public class ProductCheckWebServiceImpl implements ProductCheckWebService {

    @Override
    public String hello(@WebParam(name="barcode") String barcode) {
        return "barcode is : "+barcode;
    }
}
第三步:修改web.xml
定义cxf的servlet,在web.xml中增加以下代码:
<!--定义一个cxf的servlet-->
  <servlet>
    <servlet-name>CXFServlet</servlet-name>
    <servlet-class>org.apache.cxf.transport.servlet.CXFServlet</servlet-class>
  </servlet>
  <servlet-mapping>
    <servlet-name>CXFServlet</servlet-name>
    <url-pattern>/webservice/*</url-pattern>
  </servlet-mapping>
第四步:修改spring配置文件
修改spring配置文件 applicationContext.xml,定义webservice的发布接口:
<!--   implementor中填写接口名称;address为webservice的路径   -->
<jaxws:endpoint
            implementor="#hello"
            address="/hello"></jaxws:endpoint>
第五步:测试
在浏览器中输入webservice连接:
注意连接中的“webservice”为web.xml中配置的url-pattern;“hello”为在spring中jaxws中填写的address
http://localhost:8080/webservice/hello?wsdl
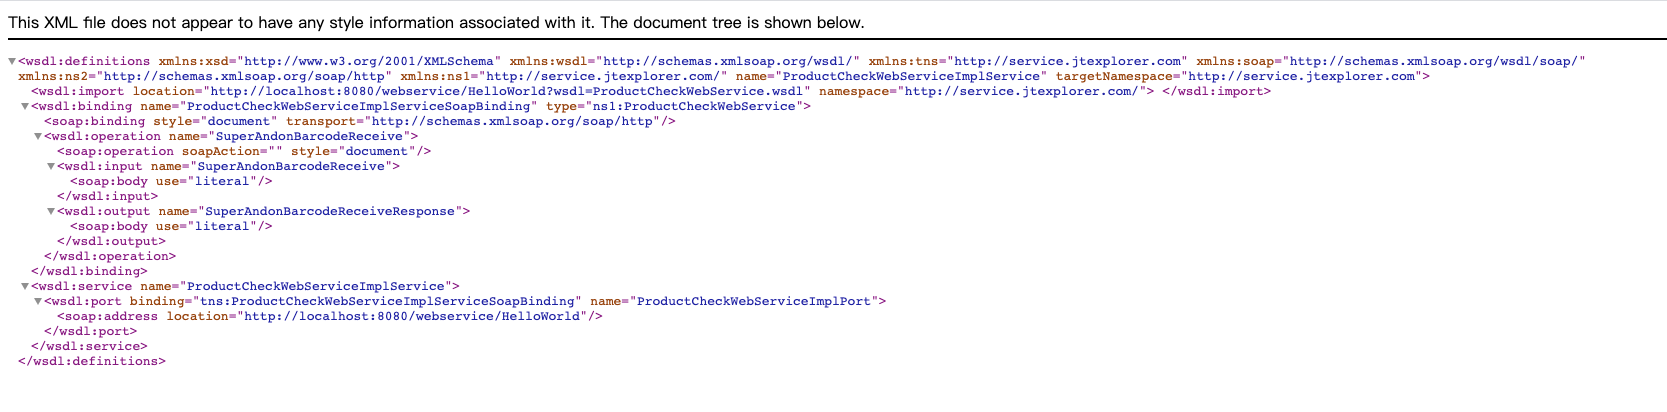
连接请求之后如出现以下结果则表示成功:
{{ commentCount }}条评论
{{ cmt.username }}
{{ cmt.content }}
{{ cmt.commentDate | formatDate('YYYY.MM.DD hh:mm') }}